Baking and music might seem like two separate worlds, but imagine being able to combine the two into an enjoyable experience?Enter the bassoon cake: an extraordinary creation where music meets culinary arts. From fans of bassoon instruments or woodwind instruments alike – or anyone simply looking for an impressive cake at their next special occasion – bassoon cakes offer both artistry and flavor in equal measures! Our guide below will walk you through everything needed from essential ingredients through decoration techniques for this amazing creation.
What Is a Bassoon Cake?
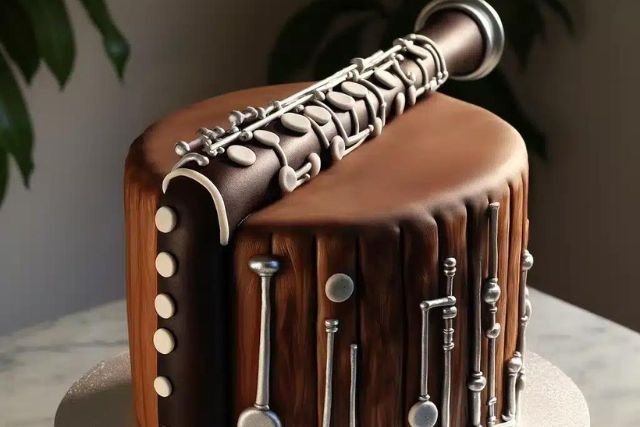
Simply stated, a bassoon cake is an intricate cake created to look like the long and elegant woodwind instrument known for its deep rich sound. Perfect for birthday parties, recitals or music themed events alike a bassoon cake not only delivers on taste but is an art piece in its own right that takes both creativity and attention to detail into account when designed properly.
Before You Start
If you enjoy both music and baking, a bassoon cake can be the ideal way to combine these passions in an edible piece of artwork that everyone will be talking about for days – not weeks! Although making such a masterpiece may sound challenging at first, with patience, persistence, and the right approach you can craft one that both looks professional and tastes delicious!
Before beginning a bassoon cake recipe, it’s crucial that all necessary ingredients for both its construction and decoration are assembled. A successful bassoon cake depends on both taste and aesthetic appeal – selecting appropriate ingredients can only add value!
For the Cake Base
2 1/2 cups all-purpose flour (softened), one cup unsalted butter, 2 cups granulated sugar, 4 large eggs with vanilla extract added, two half teaspoons baking powder and half teaspoons salt, plus an eighth of an teaspoon of baking powder are required; then pour 1/2 cup whole milk as its liquid component (without foaming agent or baking soda added for volumetric consistency), plus 34 of an teaspoon baking powder added (optional), two half teaspoons baking powder plus half teaspoon salt per 1/2 teaspoon salt umplut 1 cup whole milk
Buttercream Frosting (softened): For its components: 6 cups powdered sugar || 1/4 Cup Heavy Cream || Food Coloring (brown and black), Food Coloring (2 teaspoons vanilla extract), Food Color (2-3T)| Decoration | Fondant (white, brown & black), edible silver paint or luster dust; edible silver paint/luster dust or edible markers with black edible markers or edible silver paint/luster dust), edible silver paint or luster dusting as well as edible silver paint/luster dusting or edible markers/black edible markers/Piping gel should produce the final Bassoon Cake Step by Step Guide on Making Bassoon Cake Production Step by Step Guide on Producing Bassoon Cake Production by Step Step Guide on how to Make Bassoon Cake Production Step-by-Step. Piping gel will complete Step-By Step-by-Step Piping Gel finish Product for Decoration
Step 1: Prep of Cake Batter
Begin by preheating your oven to 350degF (175degC). Grease two 9-inch round cake pans using butter or cooking spray and lightly dusting each of them with flour to facilitate easy removal later.
Whisk all-purpose flour, baking powder and salt in a medium bowl; this combination ensures your cake rises perfectly. In another large bowl, beat butter and sugar together until light and airy — approximately three to four minutes of mixing time.
Start by gradually adding eggs one at a time until each is fully mixed into the batter before moving on to add another egg. Stir vanilla extract for that special hint before gradually mixing dry ingredients to wet mixture alternating with milk – stirring only until just mixed! Don’t overdo this process or it could result in dense cake batter!
Step 2: Bake the Cake
Preheat the oven to 250F/260C and divide your batter among both cake pans, smoothing them out using a spatula before placing them into it for 25-30 minutes until an inserted toothpick reveals clean results.
Once baked, allow the cakes to cool for approximately 10 minutes in their pans before moving them onto a wire rack for further cooling. It is vital that these are fully chilled before moving forward to decorating stage.
Step 3: Making Buttercream Frosting
Once your cakes have set and chilled completely, it’s time to prepare the buttercream frosting. In a large bowl, beat softened butter until creamy before gradually adding powdered sugar one cup at a time and mixing thoroughly after each addition. Finally add heavy cream and vanilla extract before continuing beating the frosting until light and fluffy!
To achieve an authentic bassoon color scheme, divide frosting into two equal portions and tint one brown and one black using food coloring for best results. These colors will cover your cake as you create its fine details!
Step 4: Carve and Assemble Cake
When the cakes have completely cooled, level them by trimming away any domed tops using a serrated knife – this step ensures a level surface for easier decorating!
Next, stack the two layers by spreading a thin layer of buttercream between them and stacking. Once complete, it’s time for fun part: carving into the shape of a bassoon! Use a sharp knife to carefully trim away at edges until a long and narrow bassoon form is created – don’t rush this step; patience and accuracy will yield better results in terms of aesthetic.
Once your cake has been assembled, add a thin crumb coat of brown buttercream to seal in any remaining crumbs and store for 10-15 minutes in the refrigerator so the crumb coat sets properly.
Step 5: Decorate Your Bassoon Cake
Now that the bassoon cake has been cut and coated, it’s time to bring its beauty into existence by embellishing with festive decor!
Cover the Cake With Fondant: Roll out your brown fondant onto a surface dusted with powdered sugar to prevent sticking, then drape it over your cake while smoothing with hands or using a fondant smoother. Trim away any extra fondant around its edges.
Creation of the Keys and Details: Create bassoon keys, rods, and intricate details using black fondant and edible silver paint. To further highlight them you could even try dabbing some piping gel or water onto each fondant piece for attachment purposes.
Add extra realism by using a fine brush and edible markers to add further details, like wood grain or the surface lines on the bassoon’s body.
Tips for Success
Utilize a Template: If you feel uncertain when free-handing bassoon shape carving, print out an image of one to use as a template and carve around that image instead.
Refrigerate Before Carving: Chilling cake layers before carving will help it maintain its form and make handling much simpler. A fondant smoother is invaluable in creating an even surface for fondant decorations on cakes.
Patience Is Key: Decorating a bassoon cake requires time and precision, so take your time in this enjoyable process, taking breaks as necessary if necessary. Enjoy it to its fullest!
Variations and Customizations
Feeling daring? Try customizing this bassoon cake recipe according to your own taste or dietary restrictions – here are a few variations you might like:
Flavor Varieties: If you prefer something with more intense flavors, why not switch up your recipe by replacing vanilla cake with one made with chocolate or red velvet. Add lemon zest for a tangy burst or cocoa powder for chocolatey intensity!
Filling Ideas: For added flavor, layer cakes with layers of fillings such as chocolate ganache, fruit preserves or tart cream cheese frostings to give the cake layers extra texture and character.
Fondant-Free Option: If fondant isn’t your thing, buttercream offers just as many decorative opportunities for crafting bassoon-themed cakes and cookies. Use different piping tips to craft keys and details of a bassoon.
Benefits of Baking
Beyond creating delicious treats, baking provides numerous health and mental wellbeing advantages when done at home. Here are just a few reasons why taking on projects such as making bassoon cakes could benefit both body and mind:
Ingredient Control: Baking at home gives you full control of the ingredients. Choose organic or high-quality items for best results and customize sugar or fat amounts according to personal taste.
Therapeutic Effects: Baking has long been recognized for its therapeutic effect in relieving tension. Measuring, mixing, and decorating can all provide therapeutic outlets and give a sense of accomplishment.
Baking Together as a Family Activity: Baking can be an enjoyable activity to share with family members and children alike, offering quality time together while creating something beautiful!
FAQs About Bassoon Cakes
Can I Make A Bassoon Cake Without Fondant?
Yes! A bassoon cake can easily be created using nothing more than buttercream and various piping tips that re-create its intricate details.
When can I bake and decorate my bassoon cake?
Cake layers may be baked two days ahead and stored tightly wrapped at room temperature until assembly. You can assemble and decorate it one day prior to serving by refrigerating first before returning it to room temperature on serving day.
Can I freeze a bassoon cake?
Yes. Flourishing cake layers can be frozen before decorating for up to one month of storage in the freezer, although fully decorated cakes should not be put there as these would become fragile due to moisture exposure during their journey through your pantry and fridge.
Which flavors work well in a bassoon cake?
Classic choices like vanilla and chocolate may work, however experiment with flavors like lemon, red velvet cake, or carrot cake until you find something to fit your preference.
How should I transport a bassoon cake safely?
For optimal transporting results, place it onto a sturdy board and into a sturdy cake box before keeping flat within your vehicle and avoiding sudden stops and turns as this will prevent damages to occur.
Conclusion
Crafting a bassoon cake is the ultimate combination of music and baking. While this may appear daunting at first, with careful step-by-step planning and the appropriate ingredients coming together with just enough creativity and artistic flare will result in something beautiful yet delectable that’s sure to please any music fanatic. Be it for their birthday celebration, recital celebration or simply as an art exhibit piece- this masterpiece not only delights visually and tastes, but brings together two forms of art–music and baking- into an amazing edible experience that’s sure to impress every music enthusiast who tastes it!
Practice makes perfect, so feel free to be inventive with your design. Take your time, enjoy the process and above all have fun when baking! Creating bassoon cakes can be both rewarding and educational projects; creating one can leave both you and your guests with lasting memories!
Gather your ingredients, follow this guide, and soon you will have created your very own bassoon cake masterpiece! Happy baking!